


Introduction: Why Upgrade to Heated Seats?
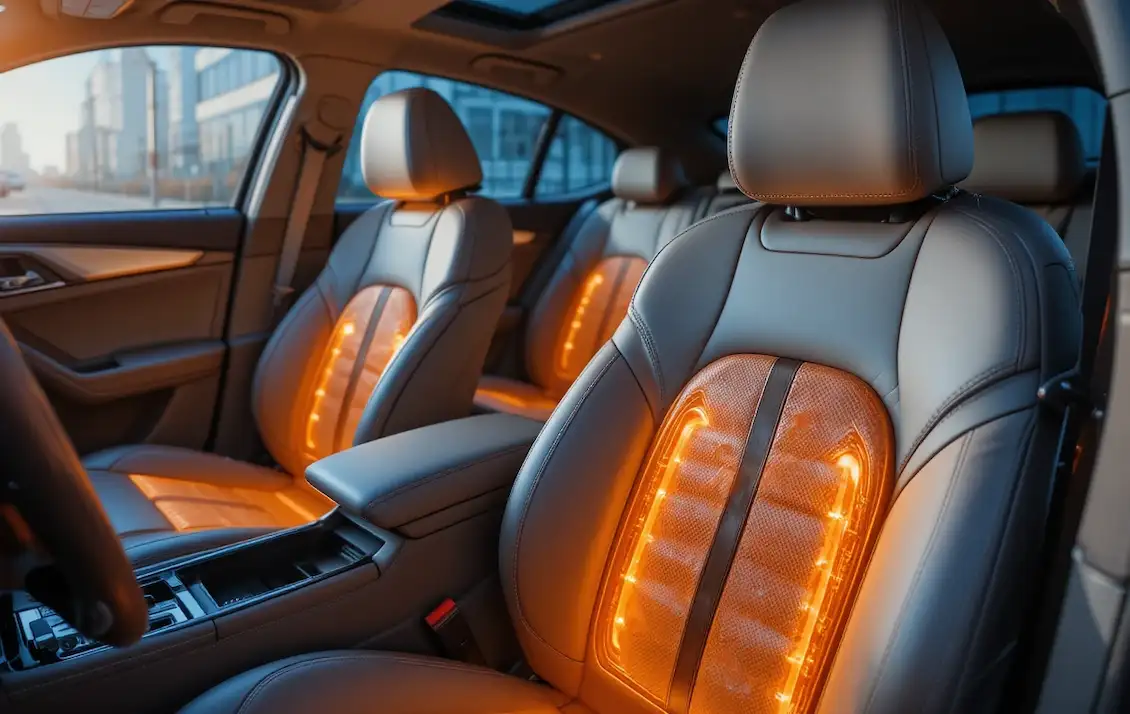
Imagine this, it’s a frosty winter morning. You open your car door, slide into the driver’s seat, and instantly feel the icy chill sink through your clothes. The steering wheel is cold to the touch, your shoulders tense, and the leather or fabric beneath you feels like it’s been sitting in a freezer all night. If you already have a stiff back or sensitive muscles, that sudden burst of cold can make the ride even more uncomfortable.
For many drivers, especially those with older vehicles or models that didn’t come with heated seats, this is an everyday winter struggle. But it doesn’t have to be. An aftermarket heated seat kit can turn those bone chilling commutes into warm, cozy drives while adding a touch of modern comfort to your car.
Now, you open your car door on that same icy morning, but this time, you sink into a seat that’s already warm and inviting. The heat seeps through your clothes, easing tense muscles and melting away the chill before you’ve even shifted into drive. Those nagging winter aches? They fade into the background as you start your journey in complete comfort.
This isn’t just a dream; it’s a simple upgrade away. In this guide, we’ll show you how aftermarket heated seat kits can bring this luxury into your everyday drive. You’ll learn how they work, why they’re worth it, and how they can improve not just your comfort, but also your health and driving enjoyment, all without the expense of buying a new car.
This comprehensive guide is your complete roadmap to transforming your ride with aftermarket heated seats. We’ll walk you through everything from understanding the different types of kits and the features that matter most to checking compatibility with your vehicle, ensuring safe installation, and even troubleshooting common issues.
By the end, you’ll have the knowledge and confidence to select and install the perfect heated seat kit for your needs. The result? Unmatched comfort, relief from cold-weather aches, and a touch of luxury that makes every drive, whether it’s a short commute or a long road trip, a warm and enjoyable experience.
The Unsung Comfort Hero of Your Car
When people think about upgrading their vehicle, they often focus on flashy features, new rims, upgraded sound systems, or high-tech gadgets. But one of the most impactful upgrades you can make is also one of the most overlooked: heated seats.
For owners of older vehicles, this small change can feel like a game-changer. It’s not about showy upgrades you notice only once in a while; it’s about daily luxury. Every single morning, every commute, every chilly evening drive becomes warmer, cozier, and more enjoyable. Heated seat kits don’t just make your car feel more modern; they quietly transform your comfort level day after day, mile after mile.
In short, they’re the unsung comfort hero, an upgrade you’ll wonder how you ever lived without.
Understanding Heated Seat Kit Types
Before you choose a heated seat kit, it’s important to understand the core technologies and features available. The right choice depends on your budget, installation skills, and how much control you want over your comfort.
Core Technologies
1. Carbon Fiber Heating Elements
Description: These kits use thin carbon fiber strips woven into flexible pads that fit neatly under your seat’s upholstery. The material’s structure allows heat to spread evenly across the entire surface.
- Even consistent heat distribution
- Highly durable and resistant to wear
- Can be trimmed slightly to fit various seat shapes (follow manufacturer guidelines)
- Rapid heat-up time for quick comfort
- Generally more expensive than wire-based systems
- Repair Difficulty
- Potential Overheating Risks
Carbon fiber’s advantage comes from its high tensile strength and excellent thermal conductivity, principles well-documented in materials science research. For longevity and comfort, carbon fiber elements are often the preferred choice in professional installations.
2. Wire Heating Elements (Less Common)
These traditional systems embed resistance wires into a pad. When powered, the wires heat up, warming the seat.
- More budget-friendly option
- Easier to Repair
- Higher Wear & Tear Risk
- Heat can be uneven, leading to “hot spots
- More prone to damage if wires kink or fray during installation or seat movement
Power Sources
Most aftermarket heated seat kits draw power from your vehicle’s 12V automotive system. They integrate directly into the car’s electrical wiring, often connecting through an accessory power source, so they only operate when the ignition is on.
Safety Note: Always use the correct fuse rating and ensure secure electrical connections to prevent overheating or short circuits.
Expert Tip: Always disconnect the Battery Before starting any electrical work. Disconnect the negative terminal of your car battery. This prevents accidental shorts, protects sensitive electronics, and keeps you safe during installation.
Control Options
- Toggle Switches: Simple and reliable, offering basic on/off or high/low settings.
- Rotary Dials: Allow more gradual adjustment of heat levels.
- OEM-Style Switches: Match your car’s factory look for a seamless, integrated appearance.
- Multi-Setting Controllers: Often digital, these provide precise temperature control, multiple heat levels, and sometimes memory functions for preferred settings.
Consider custom switch placement, integrating controls into unused dashboard spots, center console areas, or seat sides, can enhance both accessibility and your vehicle’s overall aesthetics.
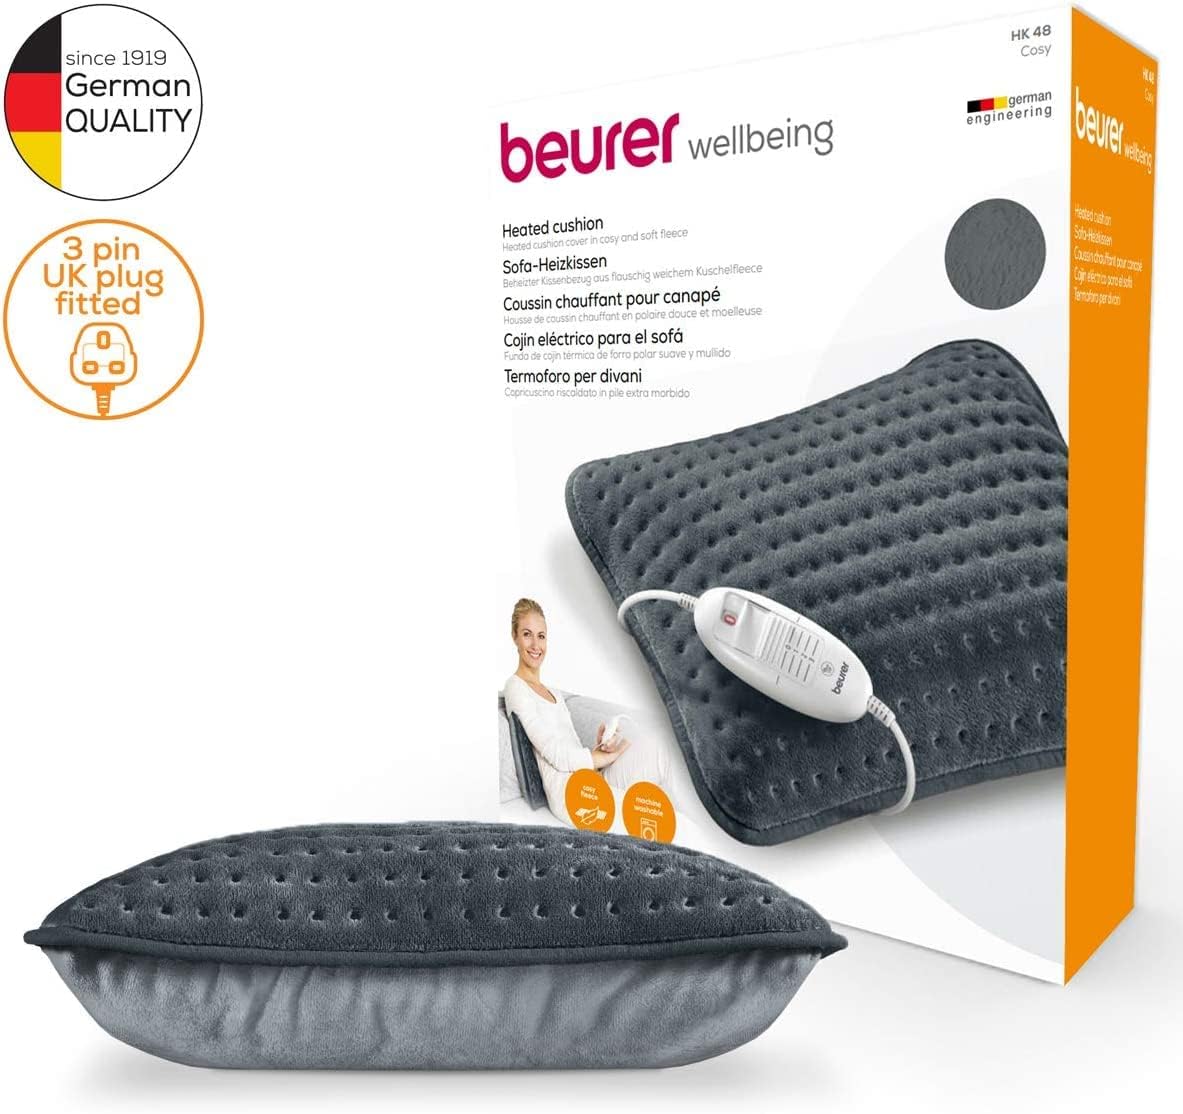
Beurer HK48 Cosy Heated Cushion Soft Reversible Sofa Pillow with Integrated Heat Pad
Features:
- Brand: Beurer
- Material: Fleece
- Color: Extra Soft Reversible Cover
- Colors: Black, Shadow Gray, or Dust Rose
- item's weight: 0.62 Kilograms
The Beurer HK48 Cozy Heated Cushion combines the comfort of a soft, reversible sofa pillow with the soothing warmth of an integrated heat pad. Featuring rapid heat-up in 30–45 minutes,3 adjustable temperature settings, and an automatic 90-minute switch-off, it’s skin-friendly, breathable, and machine washable for everyday comfort and safety.
Key Features to Look for in a Heated Seat Kit
With so many heated seat kits on the market, it’s easy to feel overwhelmed. The key is knowing what to prioritize so you get the best blend of comfort, safety, and long-term reliability.
1. Pad Size and Flexibility
The heating pads should closely match your seat’s dimensions for optimal coverage. Look for pads that are flexible enough to follow your seat’s natural curves, especially important for bucket seats or contoured designs. Poorly fitted pads can create uneven heat and reduce comfort.
2. Number of Heat Settings
Some kits offer only simple high/low modes, while others provide multiple adjustable levels for personalized comfort. More settings allow you to fine-tune warmth depending on weather conditions, trip length, or personal preference.
3. Rapid Heating Capability
No one wants to wait 10 minutes for warmth on a freezing morning. The speed at which the pads heat up depends on their wattage and the type of heating element used. Carbon fiber pads typically heat faster and more evenly than wire elements.
4. Auto Shut-Off Feature
An essential safety feature that prevents overheating and protects your battery from unnecessary drain if you forget to turn the system off.
Expert Tip: Look for kits with integrated thermostats or temperature sensors. These automatically regulate heat output to maintain consistent warmth without hot spots.
5. Wiring Harness Quality
Your wiring harness should feature durable, heat-resistant insulation and secure connectors. Pre-wired harnesses simplify installation, while DIY wiring requires more skill and attention to safety.
6. Adhesive Backing
A quality adhesive ensures the heating pads stay firmly in place under your seat upholstery. Weak adhesives can shift over time, leading to uneven heat or potential damage during seat use.
7. Overall Kit Quality and Durability
Choose kits that meet or exceed automotive electrical safety standards, and look for brands with proven performance in real-world conditions. Professional installers often favor carbon fiber heating elements for their durability and even heat distribution.
When in doubt, prioritize carbon fiber kits over traditional wire-based models. They’re typically more efficient, longer-lasting, and provide a smoother heating experience
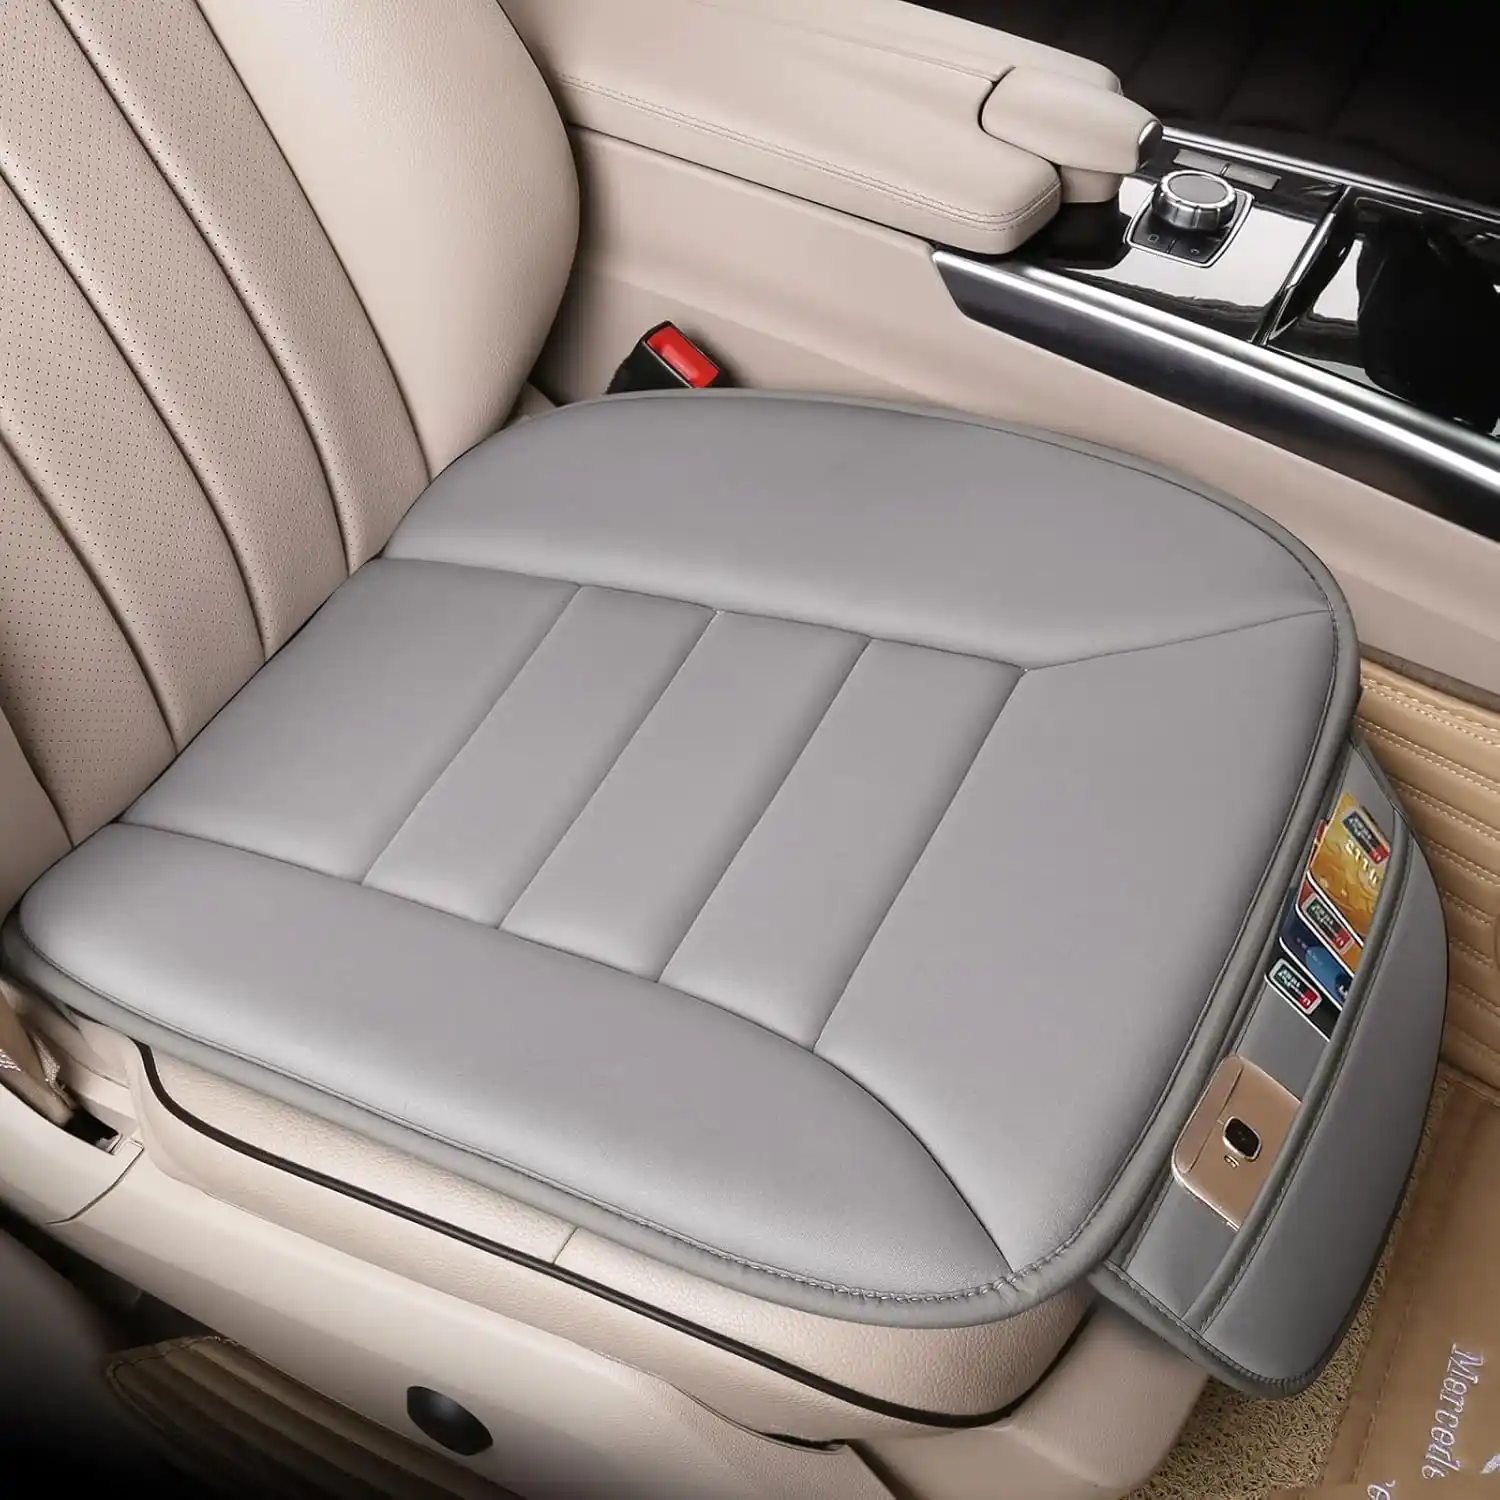
Lofty Aim Premium Car Seat Cushion
Features:
- Brand: Lofty Aim
- Fill material: Memory Foam
- Size: 19.7"* 19.7"* 1.5"
- Colors: Gray
- Special Feature: car seat cushion for back pain, car seat cushions for driving butt pain, cushion for car seat driver for comfort, seat cushion for sciatica pain relief
Lofty Aim’s Premium Memory Foam Car Seat Cushion offers all-season comfort with skin-friendly fabric, ergonomic tailbone support, and a non-slip base. Its unique storage pouch keeps essentials within reach, while protecting your car seat from wear and tear. Suitable for 99% of car models and versatile for office, travel, or outdoor use.
Compatibility Considerations: Will it Fit My Car?
Before buying a heated seat kit, you need to ensure it will work with your vehicle’s seats, materials, and electrical system. The wrong fit can lead to poor performance, safety risks, or wasted money.
Universal vs. Vehicle Specific Kits
- Universal Kits: These are designed to fit a wide range of vehicles. They’re adaptable and usually more affordable, but they require careful measurement to ensure proper coverage and avoid folding or trimming the heating pads too much.
- Vehicle-Specific Kits: Built for particular makes and models, these often offer a more seamless fit and easier installation. However, they tend to be more expensive and may have limited availability.
Seat Material Impact
- Leather/Vinyl: Generally compatible, but the upholstery removal process needs extra care to avoid creasing or tearing.
- Cloth: Similar to leather in compatibility, though installation may be slightly easier with a more flexible fabric.
- Specialty Materials: Alcantara, suede, or other unique seat coverings may require professional handling to avoid damage or uneven heat distribution.
Seat Construction & Existing Sensors
Foam Type: Dense or molded foam can make pad insertion more challenging.
Occupancy Sensors: Many modern vehicles have seat occupancy sensors tied to airbag systems.
Expert Tip: Ensure heating pads do not interfere with these sensors. Blocking them could affect airbag deployment and compromise safety.
Airbags: Exercise extreme caution with seat-mounted airbags and related wiring.
Expert Tip: Always consult your vehicle’s service manual before installation to avoid damaging airbag systems.
Electrical System Compatibility
- Ensure there’s an available 12V power source that switches on/off with the ignition.
- Confirm your fuse box has capacity and that the circuit you plan to use can handle the additional load without risk.
Compatibility Table: Will it Fit My Car?
|
Consideration |
Description |
Impact on Installation/Kit Choice |
|
Seat Dimensions |
Measure the width and length of the seat base and backrest. |
Ensures pads fit without folding or overlapping, crucial for comfort and longevity. |
|
Seat Material |
Leather, cloth, vinyl, specialty fabrics. |
Most kits are compatible, but all require careful upholstery handling; specialty fabrics may react differently to heat. |
|
Seat Construction |
Foam type (density, shape), presence of existing wire supports or sensors. |
Affects ease of pad insertion and securing; sensors (occupancy, airbag) must remain unobstructed. |
|
Existing Seat Features |
Lumbar supports, power seat motors, airbags, and side bolsters. |
Pads must be routed around these components; airbag wiring and sensors require special care. |
|
Electrical System |
Available 12V power source, fuse box capacity, and accessory power availability. |
Determines wiring ease and safety; must be connected to ignition-switched power. |
|
Switch Placement |
Available dash/console space or blank switch panels. |
Dictates whether toggle, rotary, or OEM-style switches will fit cleanly. |
|
Vehicle Make/Model Year |
Specific interior design, wiring diagrams, and electrical quirks. |
Some vehicles have complex electronics that may need professional installation. |
Pro Tip for Peace of Mind:
Check vehicle-specific forums or online installation guides for your exact make, model, and year. Real-world experiences from other drivers can reveal hidden challenges or confirm compatibility before you buy.
DIY vs. Professional Installation: What to Expect
Upgrading to heated seats is an exciting project, but before you grab your toolbox, it’s important to decide whether you’ll tackle the job yourself or hire a pro. Your choice should be based on your skill level, the complexity of your vehicle, and your comfort with working on both upholstery and electrical systems.
DIY Installation Assessment
Difficulty Level:
Installing a heated seat kit typically requires intermediate mechanical skills and basic to moderate electrical knowledge. You’ll need to be comfortable removing seat upholstery, routing wiring through your interior, and making safe electrical connections.
Required Tools:
- Upholstery Hog Ring Pliers & Hog Rings – Essential for reattaching seat covers securely after installation.
- Trim Removal Tools – Prevents damage when removing interior panels and trim pieces.
- Multimeter: For safely testing circuits and ensuring correct electrical connections.
- Wire Strippers/Crimpers & Connectors: Needed for clean, reliable wiring work.
Potential Pitfalls:
- Damaging seat upholstery or interior trim during removal/reinstallation.
- Incorrect wiring that could lead to blown fuses, malfunctions, or fire hazards.
- Interfering with seat sensors or airbag wiring can compromise safety
Audience Pain Points & Solutions:
- Fear of damaging the vehicle interior: Work slowly, use the correct tools, and avoid forcing any components.
- Confusion over electrical work: Follow the kit’s wiring diagram closely, verify connections with a multimeter, and always fuse your circuits properly.
Expert Tip: Patience is Key. Upholstery and trim can be surprisingly delicate. Taking your time will prevent costly mistakes.
Expert Tip: Know When to Go Pro If your vehicle has integrated electronics, advanced seat designs, or you’re uneasy with electrical work, professional installation is the safer choice.
Professional Installation Overview
Benefits:
- Installer expertise and experience
- Access to specialized tools
- Warranty on both labor and parts
- Peace of mind that your kit is installed safely and correctly
Costs:
Professional installation typically ranges from $150 to $400 per seat, depending on your location, vehicle type, and whether you supply the kit.
Transparency Note: We strongly recommend professional installation for vehicles with seat-mounted airbags, complex electrical systems, or if you lack prior experience.
What to Ask a Pro’ Checklist
When getting installation quotes, ask these key questions:
- Are you experienced with aftermarket heated seat installations?
- What type of heated seat kit do you recommend and why?
- What is your warranty on parts and labor?
- How do you ensure electrical safety and proper fusing?
- Can you show examples of previous installations?
- How long will the installation take?
- What is the total cost, including parts and labor?
- Will the installation affect my vehicle’s existing warranty? (Clarify the difference between aftermarket parts and OEM systems.)
Step-by-Step Installation Overview(General Principles)
While each vehicle and heated seat kit is a little different, the overall installation process follows a similar sequence. Below is a high-level guide to help you understand the main steps, common challenges, and how to avoid costly mistakes.
1. Seat Removal
Safely unbolt the seats from the floor using the correct socket size for your vehicle. Most seats have four main bolts. Carefully tilt the seat back or forward to access any wiring underneath, such as airbag connectors, seat sensors, or power motor cables. Always disconnect these harnesses before lifting the seat out to prevent strain or damage.
2. Upholstery Removal
To install the heating pads, you’ll need to remove or loosen the seat covers. This usually involves cutting hog rings or releasing clips/zippers. Upholstery Hog Ring Pliers make reassembly much easier. Work slowly to avoid tearing fabric or scratching leather.
3. Pad Installation
Place the heating pads flat and centered on the seat foam. Follow the manufacturer’s instructions for trimming (carbon fiber pads can sometimes be shortened in specific zones, while wire pads generally cannot). Use strong adhesive to keep pads in place and never cover occupancy sensors or airbag components.
4. Wiring (Power, Ground, Switch)
Route the wiring harness from the seat to the chosen power source, avoiding moving parts, sharp edges, and heat sources. Connect the power to a switched 12V source, the ground to a solid chassis point, and route wiring to your switch location. Use a multimeter to verify the correct circuit before tapping in. Always fuse the circuit according to the kit’s specifications.
5. Reassembly
Reverse the disassembly process: reattach seat covers with new hog rings or clips, reinstall trim pieces, and bolt the seat back into place. Double-check that no wires are pinched or rubbing against metal edges.
6. Testing
Before fully securing the seat, test the system. Turn the ignition on, activate the heated seats, and verify both pads are warm evenly. If something doesn’t work, troubleshoot now before putting everything back together.
Installation Stage Challenges and Solutions
|
Installation Stage |
Common Challenge |
Solution/Tip |
|
Seat Removal |
Stripped bolts, heavy seats, tangled wires. |
Use correct socket sizes, get help lifting, and carefully disconnect all wiring harnesses before removal. |
|
Upholstery Removal |
Stubborn hog rings, brittle plastic clips, and tearing fabric. |
Use hog ring pliers, specialized trim tools, and apply gentle leverage; warm up plastic clips to make them more pliable. |
|
Pad Installation |
Uneven heat spots, pad shifting, and interference with sensors. |
Ensure pads are flat and centered, use strong adhesive, cut carbon fiber pads only where specified, and avoid covering sensors. |
|
Wiring & Routing |
Short circuits, exposed wires, interference with moving parts, and finding constant/switched power. |
Always disconnect the battery, use proper gauge wire, secure with zip ties, route away from sharp edges/heat, and use a multimeter to find appropriate power sources. |
|
Switch Installation |
Finding a suitable dash space, cutting holes cleanly. |
Use templates provided with the kit, start with a small pilot hole, use appropriate drill bits/hole saws, and consider OEM-style blanks if available. |
|
Reassembly |
Misaligned seat covers, loose trim pieces, pinched wires. |
Take photos during disassembly, ensure hog rings are correctly re-secured, snap trim pieces back firmly, and double-check no wires are pinched. |
|
Initial Testing |
No heat, intermittent heat, one pad not working. |
Test all functions before fully reassembling; use a multimeter to check for power and continuity at each connection. |
Real World Insight:
In a compact sedan, the challenge might be routing wiring through tight spaces without snagging on sharp edges. In a truck, heavier seats and longer wire runs could pose a problem. SUVs with integrated lumbar or cooling fans may require rerouting pads to avoid airflow obstructions.
Pro Tip: Always keep your vehicle’s service manual nearby it contains the safest trim removal procedures and accurate wiring diagrams for your exact make and model.
Electrical Safety & Wiring Best Practices for Heated Seat Installations
When installing heated seats, your comfort upgrade shouldn’t come at the cost of safety. A well-planned electrical setup ensures your kit works reliably while protecting your vehicle from shorts, overheating, or even fire hazards.
Understanding 12V Automotive Electrical Systems
Most vehicles use a 12-volt DC (direct current) system. Three key terms matter here:
- Voltage (V): The electrical pressure. Most car accessories operate at 12–14V.
- Amperage (A): The amount of current flowing. Heated seats typically draw 3–5A per pad.
- Wattage (W): Total power consumed (V × A). Knowing wattage helps you size fuses and wires correctly.
Series vs. Parallel Circuits: In parallel, each accessory gets full voltage (best for heated seats). In a series, voltage is split, which can cause poor performance.
Proper Fusing Your First Line of Defense
A dedicated fuse is essential for protecting both the circuit and your vehicle.
- Correct sizing: To find the right fuse size, check the kit’s documentation or calculate:
Fuse size (A)=Current draw (A)×1.25\text{Fuse size (A)} = \text{Current draw (A)} \times 1.25Fuse size (A)=Current draw (A)×1.25
(The 25% overhead prevents nuisance blows while still offering protection.) - Example: If the kit draws 8A, use a 10A fuse.
Expert Tip: Proper Fuse Sizing is Critical. Never oversize a fuse just to “stop it blowing.” That defeats its safety purpose.
Relay Use Optional but Recommended
A relay acts like an electrically controlled switch, allowing a low-power signal to control a high-power accessory.
- When to use: If your kit draws more than ~10A or you want the seats to only power on with ignition.
- Benefit: Prevents overloading switches and extends their life.
Basic Relay Function:
- Low-current control wire triggers the relay coil.
- Relay closes high-current contacts, powering the heated seat.
Grounding The Silent Safety Factor
Your heated seats won’t work correctly without a proper ground.
- Use a clean, bare metal surface on the chassis.
- Avoid rusty, painted, or loose connections.
- Tighten firmly and use star washers for bite.
Protecting Wiring: Build it to Last
- Routing: Keep wires away from pedals, seat tracks, hinges, and hot engine/exhaust components.
- Protection: Use wire loom, zip ties, and electrical tape to prevent abrasion.
- No sharp bends: Maintain smooth curves to avoid stress points.
Expert Tip: Route Wires Safely. Poor routing is the #1 cause of long-term failures.
Troubleshooting Electrical Issues
If your seats aren’t heating:
- Check the fuse. Replace if blown (but investigate why).
- Test continuity with a multimeter to confirm no wire breaks.
- Verify voltage at the seat connection point.
Differentiation Opportunity Goes Beyond the Basics
Offer your customers or readers clear wiring diagrams for:
- Heated seat with dedicated fuse only.
- Heated seat with relay + ignition-switched power.
This not only reduces confusion but positions you as a trusted authority in DIY automotive upgrades.
Reading Heated Seat Kit Brands & Recommended Picks
How to Evaluate Brands
- Reputation & Reviews: Look for well-established brands with consistently high ratings.
- Warranty & Customer Support: Top companies offer strong warranty coverage and responsive support.
- Quality Assurance: Brands trusted by professionals and those with rigorous quality controls tend to deliver safer, longer-lasting products.
Recommended Kit Comparison Table
|
Kit Model / Brand |
Type |
Heat Settings |
Switch Style |
Pros |
Cons |
Price Range* |
|
Rostra ComfortHeat (250-1900) |
Carbon Fiber |
High / Low (Dual-Zone) |
OEM-style rocker |
Even heat, quickly warms (under a minute), trimmable, flammability-compliant (Walmart.com, mnrelectronics.com, Rostra) |
Higher price, may require trimming; limited switch options (Rostra, mnrelectronics.com) |
$$$ |
|
Dorman Universal Kit (628-040) |
Carbon Fiber |
High / Low |
Toggle switch |
All-in-one kit (pads, pliers, switch, harness), reliable U.S. engineering, affordable (CARiD, dormanproducts.com, RockAuto) |
Basic switch, harness quality slightly less robust (CARiD, Advance Auto Parts) |
$$ |
|
Generic (e.g., AmazonBasics) |
Carbon Fiber (budget) |
2–5 levels |
Toggle or Rotary |
Very affordable, suitable for simple upgrades |
Inconsistent quality, sparse instructions, limited support |
$ |
|
OEM-Grade Supplier (e.g., Check Corp.) |
Carbon Fiber |
Multi-setting |
OEM-style |
Used by manufacturers, precise control, built to last |
Hard to source publicly, the highest price point |
$$$$ |
Insights & Safety Disclosure
Our product recommendations are based on:
- Industry standards (e.g., FMVSS 302 flammability compliance)
- Materials science principles (carbon fiber’s stability and heat diffusion)
- Real-world performance feedback from installers and trusted retailers
Transparency Note: If affiliate links are used in your final piece, be sure to disclose them clearly for trust and compliance.
Troubleshooting Common Heated Seat Kit Issues
Even the best heated seat kits can occasionally act up. The good news? Most problems are simple to diagnose and fix without professional help. Below, you’ll find the most common issues, step-by-step checks, and easy fixes so you can get back to enjoying warm, comfortable drives.
1. No Heat (One or Both Pads)
Possible Causes & Fixes:
- Blown fuse: Locate the heated seat circuit fuse, check if it’s blown, and replace it with the correct amperage.
- Power or ground issue: Use a multimeter to confirm you’re getting the correct voltage and proper grounding.
- Damaged wiring: Inspect for pinched, broken, or disconnected wires.
- Faulty switch: Test with a multimeter or swap temporarily with a working switch if available.
2. Intermittent Heating
Possible Causes & Fixes:
- Loose wiring connections: Re-secure any loose plugs or connectors.
- Overheating protection triggering: Check pad placement; overheating sensors may cut power if pads overlap or fold.
- Defective switch or relay: Test components and replace if faulty.
3. Fuse Blowing Repeatedly
Possible Causes & Fixes:
- Short circuit in wiring: Inspect all cables for exposed or frayed sections touching metal.
- Wrong fuse size – Ensure you’re using the manufacturer’s recommended amperage.
- Damaged heating element: Replace the pad if the element is burnt out.
4. Uneven Heating or Hot Spots
Possible Causes & Fixes:
- Improper pad installation – Pads should be smooth, flat, and without folds or creases.
- Faulty heating element – More common in wire-based pads than carbon-fiber ones; replace if damaged.
5. Switch Not Working
Possible Causes & Fixes:
- No power reaching the switch-Trace the power supply back to fuse and wiring.
- Defective switch: Replace with a compatible part.
- Incorrect wiring: Double-check your wiring diagram for proper connections.
Visual Aid: Troubleshooting Flowchart
A simple diagram could make this process even easier. Imagine:
[Heated Seat Not Working?]
|
[Check Fuse] No → Replace fuse with correct amperage → Done
|
Yes
↓
[Is Switch On?] No → Turn On → Done
|
Yes
↓
[Check Wiring & Connections] Loose? → Secure connections → Done
|
No
↓
[Test Heating Pad & Switch] Faulty? → Replace → Done
Maintenance and Longevity Tips for Your Heated Seat Kit
Aftermarket heated seat kits can last for years if you treat them right. A little care goes a long way in keeping them warm, reliable, and safe. Here’s how to get the most out of your investment:
1. Proper Usage
- Go gentle on your seats – Avoid putting heavy or sharp objects on the upholstery. These can damage the heating pads hidden inside.
- Handle cleaning with care: When wiping or vacuuming, don’t press too hard or use tools that could pinch the wiring.
2. Cleaning & Care
- Follow the manufacturer’s cleaning guide – They know which cleaning agents are safe for your seat material and electronics.
- Avoid harsh chemicals. Strong cleaners can break down the seat fabric and may corrode wiring or connectors over time.
3. Electrical System Checks
- Inspect wiring periodically: Look for frayed insulation, pinched wires, or any exposed copper.
- Check connections: Make sure plugs and terminals are firmly in place, especially after moving or adjusting seats.
4. Addressing Wear and Tear
- Pad not heating? You may only need to replace the heating pad instead of the entire kit, which saves both money and time.
- Catch issues early: The sooner you spot a small problem, the less likely it’ll turn into a costly repair.
Pro Tip: Treat your heated seats like you would any electrical appliance. Respect the wiring, keep it clean, and don’t overload it. Doing so will help you enjoy cozy, reliable warmth for many winters to come.
Your Burning Questions Answered
Conclusion: Enjoying Your Newfound Warmth
From the moment you switch them on, heated seats elevate your driving experience, offering unmatched comfort, a touch of luxury, and even potential health benefits by easing muscle tension during chilly drives. Beyond the warmth, they transform your vehicle into a more inviting space, making every winter journey more enjoyable.
Whether you’re ready to tackle a DIY installation or prefer leaving it to a professional, the path to a cozier ride is well within your reach. Don’t let cold weather dictate your comfort any longer. Equip your vehicle with the right kit, follow this guide, and enjoy the warmth every time you drive.
Beyond the Kit: Maximizing Your Heated Seat Investment
Think of this upgrade not just as a seasonal perk, but as a long-term enhancement to your vehicle. Comfort-conscious buyers often value features like heated seats, meaning you could see a return on your investment when it’s time to sell or trade in.