


The Parking Predicament: Why Every Driver Needs a Little Help
Have you ever felt that heart-sinking moment when you hear a crunch while reversing? Tight parking spaces can make even confident drivers nervous, and it only takes one hidden post or low wall to leave an expensive mark on your car. Parking mishaps are not only frustrating but also surprisingly common, and they can happen to anyone, regardless of their driving experience.
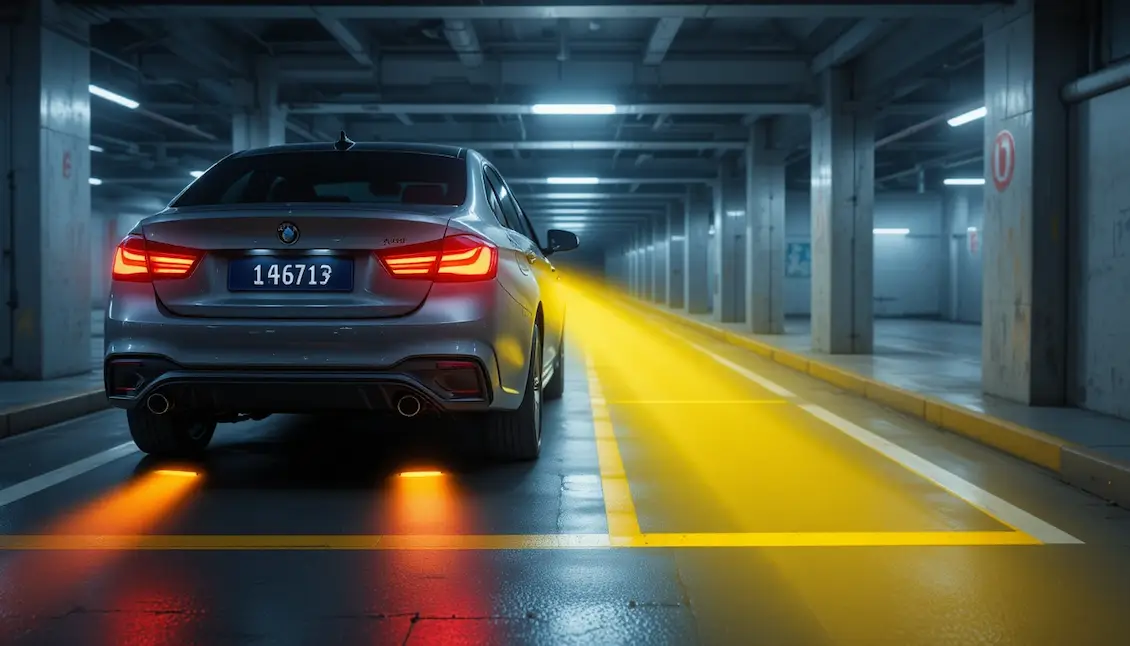
As cars become larger and streets become more crowded, parking has turned into a daily challenge. Blind spots are bigger, visibility is smaller, and the margin for error keeps shrinking. But imagine parking without anxiety, knowing exactly how much space you have left every single time. With a reliable parking sensor system, that peace of mind is entirely possible.
In this guide, you will learn everything you need to know to install parking sensors in your own car. The process is easier than most people think, and doing it yourself can save you a significant amount of money. You will find step-by-step instructions, expert recommendations for the best kits, and practical tips to make your installation clean, accurate, and long-lasting. By the end, you will not only protect your vehicle but also gain the satisfaction of completing a smart upgrade with your own hands.
Why Install Parking Sensors? The Undeniable Benefits
Parking sensors are more than just a modern convenience. They are a practical safety feature that makes every drive more confident and worry-free. Whether you are an experienced driver or just someone who values precision and care, installing parking sensors can transform the way you handle your car in tight spaces.
1. Enhanced Safety for You and Others
Prevent Accidents
Parking sensors act as an extra set of eyes, helping you detect obstacles you might not see. They can alert you to children, pets, or objects that are hidden from view, reducing the chance of a sudden accident. A quick warning sound can make all the difference between a safe stop and a costly mistake.
Reduce Blind Spots
Even the best mirrors cannot show everything around your vehicle. Sensors fill in those hidden areas, especially behind larger cars or SUVs, giving you a complete sense of what’s around you. This added awareness makes reversing and maneuvering much safer and smoother.
2. Protect Your Vehicle and Your Wallet
Avoid Costly Repairs
Even a small bump can lead to big repair bills. Parking sensors help you avoid those frustrating moments when a slight misjudgment leads to scratches, dents, or cracked lights. A one-time installation can save you hundreds on paint and bodywork over the years.
Maintain Resale Value
A car that looks well cared for always attracts better offers. By avoiding scrapes and dents, you keep your vehicle’s exterior in top condition, which helps maintain its resale value when it’s time to upgrade or sell.
Lower Insurance Premiums (Potentially)
Many insurance companies recognize parking sensors as an added safety feature. Some even offer lower premiums because of the reduced risk of parking-related claims. It’s worth checking with your provider to see if you qualify for a discount.
3. Convenience and Confidence in Every Parking Maneuver
Stress Free Parking
Tight spots and crowded areas can test anyone’s patience. With parking sensors, you can navigate confidently without second-guessing the distance between your car and surrounding objects.
Effortless Parking Mastery
The combination of audible alerts and visual cues helps you park with precision. Even in dark or tricky conditions, you can rely on your sensors to guide you safely and smoothly.
Peace of Mind
Beyond the practical benefits, parking sensors simply make driving feel better. Knowing that you have an extra layer of protection reduces stress and makes every parking experience calm and controlled.
Understanding Your Options: Sensor Types and Systems
Before you begin your installation, it is important to understand the types of parking sensors available and how each one works. Choosing the right system for your vehicle will make a big difference in how effective and reliable your setup feels. A little knowledge here goes a long way toward ensuring long-term satisfaction and performance.
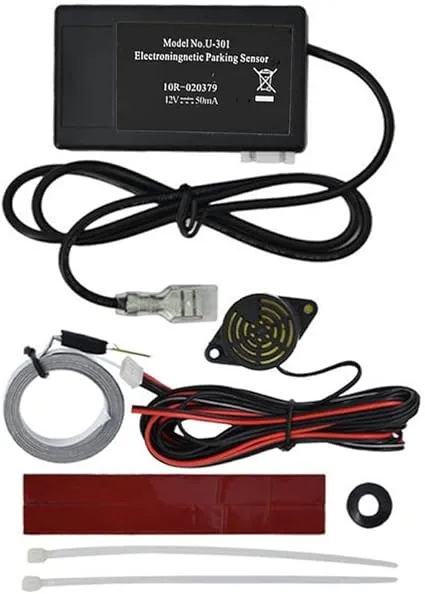
Ultrasonic vs Electromagnetic Sensors: Key Differences
Why Sensor Type Matters
Selecting the correct sensor type is the foundation of a smooth and successful installation. The right choice depends on your vehicle's style, parking habits, and even your preference for drilling into your bumper. Knowing the pros and cons of each system allows you to make an informed decision and achieve the best results for your needs.
How They Work
Ultrasonic sensors use sound waves that bounce off nearby objects. The system measures how long the sound takes to return, translating that into distance. This is similar to how bats navigate in the dark using echolocation.
Electromagnetic sensors, on the other hand, create a magnetic field along your bumper. When an object enters this field, the system detects a change and sends an alert. These sensors do not require visible holes or external components, which makes them ideal for those who want a clean, factory-style appearance.
Understanding these technologies not only helps you make better decisions but also shows that you are investing in your safety and your car’s integrity with care and expertise.
|
Feature |
Ultrasonic Sensors |
Electromagnetic Sensors |
|
Detection Method |
Sound waves (pulse and echo) |
Electromagnetic field (detects changes) |
|
Range |
About 0.3 to 2.5 meters (around 1 to 8 feet) |
About 0.1 to 0.7 meters (around 4 to 28 inches) |
|
Obstacle Detection |
Best for detecting larger, distinct objects directly behind your car |
Excellent for identifying smaller or lower obstacles, such as curbs, along the full width of the bumper |
|
Blind Spots |
May have small gaps between sensors |
Provides continuous detection across the entire sensor strip |
|
Installation |
Requires small holes in the bumper for sensor placement |
Uses an adhesive strip mounted inside the bumper, no drilling required |
|
Performance |
Can be affected by rain, snow, or heavy dirt, and may occasionally trigger false alerts |
Less influenced by weather, but can be sensitive to metal objects near the bumper |
|
Cost |
Usually more budget-friendly |
Often slightly higher in price due to advanced design |
|
Ideal Use |
Great for general parking and reversing in open areas |
Perfect for tight spaces, parallel parking, and when maintaining bumper aesthetics is a priority |
Choosing Between the Two:
If you drive a larger vehicle such as an SUV or pickup, ultrasonic sensors might be a better choice because they offer a wider detection range and perform well in open parking situations. However, if you prefer a cleaner look without visible sensors or if you often park in tight city spaces, an electromagnetic system can offer seamless detection with no visible modifications.
Whichever option you choose, both systems can significantly enhance safety, confidence, and convenience when parking.
Wired vs Wireless Systems: What Is Best for Your Setup
When choosing your parking sensor system, one of the most important decisions you will make is whether to go for a wired or wireless setup. Both options have clear advantages depending on how comfortable you are with installation work and what kind of driving experience you want. Understanding how each system operates will help you make the right choice for your car and your level of DIY confidence.
Installation Complexity
The biggest difference between wired and wireless systems is the effort required during installation.
Wired systems involve connecting sensors directly to a control unit, which is then linked to the vehicle’s power source, often through the reverse light circuit. This means you will need to route cables through the interior or underbody of your car. It takes a little more time and patience, but once installed, the setup is sturdy and long-lasting.
Wireless systems, on the other hand, are much simpler to install. The sensors usually connect to a central control box, which sends signals wirelessly to a display unit on your dashboard. These displays may run on batteries or even have a small solar panel for power. While less wiring means easier setup, some users might find that wireless systems need more occasional maintenance to keep everything working smoothly.
Reliability and Performance
Wired systems are known for their reliability. Because they use direct connections, the signal is stable, consistent, and less likely to be affected by interference or low power. Once installed, a wired setup performs with precision and near instant response time, even in complex environments such as parking garages or busy streets.
Wireless systems offer great convenience, but they can sometimes experience slight delays or interference, especially with lower-cost kits. However, many modern wireless systems are much improved and deliver performance that most drivers find more than adequate for daily use.
It is also worth noting that “wireless” typically refers to the link between the control box and the display unit. The sensors themselves are usually still wired to the main control box inside the vehicle.
Power and Maintenance
Wired systems draw power directly from your car’s electrical system, meaning you never have to worry about replacing batteries. Once fitted, they require almost no ongoing maintenance apart from occasional cleaning of the sensors.
Wireless systems, however, rely on batteries for both the display and, in some cases, the sensors. Some displays use small solar panels to stay charged, which is a convenient and eco-friendly option. But over time, you may need to replace or recharge batteries and ensure that the solar panel has good exposure to sunlight.
|
Feature |
Wired Systems |
Wireless Systems |
|
Reliability |
Very stable and dependable connection with minimal interference |
May experience occasional signal drops or interference, depending on the quality |
|
Installation Complexity |
More involved, requires routing wires to the power source |
Easier installation, less wiring, often includes a battery or solar-powered display |
|
Power Source |
Draws power from the car’s electrical system |
Usually battery-powered or solar-assisted for the display unit |
|
Latency |
Immediate response |
May have a small delay in transmission, particularly in budget kits |
|
Cost |
Varies, often similar to basic wireless models |
Can be slightly more expensive for advanced designs with solar or long-range capability |
|
Aesthetics |
Very clean look if wires are neatly hidden during installation |
External parts like solar panels or larger displays may be more visible |
|
Maintenance |
Minimal, mostly sensor cleaning |
Requires battery checks, solar panel upkeep, and occasional signal testing |
Choosing the Right System
If you enjoy detailed hands-on projects and want the most reliable connection possible, a wired system is an excellent choice. It offers professional-grade performance once installed and requires almost no follow-up maintenance.
If you prefer a quicker setup with fewer tools, or if you plan to install sensors on multiple vehicles, a wireless system might be more practical. The convenience of plug-and-play components can make installation faster and less intimidating, especially for first-time DIY users.
Both types can deliver excellent safety and parking precision, so the best choice depends on your comfort level, time, and the specific design of your car.
Getting Ready: Pre-Installation Essentials
Before you begin the actual installation, it is worth taking a little time to get fully prepared. Having the right tools and materials from the start can save you a great deal of frustration and ensure that your installation looks neat, professional, and reliable. Preparation is what separates a good DIY project from a great one.
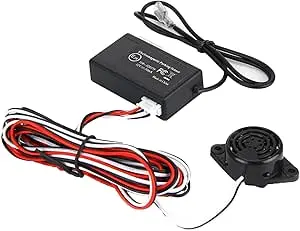
1. Tools and Materials Required for a Smooth Installation
Preparation Is Key
Gathering the right tools before you start will not only make the process faster but will also reduce the chances of mistakes. A clean, organized workspace and the correct equipment will help you focus on accuracy, safety, and confidence while you work on your vehicle.
Below is a detailed checklist of the tools and materials you will need, along with their purpose and a few trusted brand suggestions for reliability and ease of use.
|
Category |
Item |
Purpose |
|
Safety Gear |
Safety Glasses, Work Gloves |
Protect your eyes and hands from metal shavings, debris, and sharp edges. Recommended brands include 3M for eye protection and Mechanix Wear for gloves. |
|
Drilling and Cutting |
Electric Drill (cordless recommended), Hole Saw Kit (18 to 25 millimeters, matching your sensor size) |
Used to create precise holes in the bumper for mounting the sensors flush. DeWalt and Bosch make excellent cordless drills. Always double-check your sensor diameter before drilling. |
|
Wiring |
Wire Strippers and Crimpers |
Help prepare wire ends and attach connectors securely. Klein Tools and Irwin are well known for durable, ergonomic designs. |
|
Testing |
Multimeter |
Essential for identifying the correct power and ground wires, especially when connecting to the reverse light circuit. Fluke and AstroAI multimeters are reliable and beginner-friendly options. |
|
Connections |
Electrical Connectors (butt connectors, T taps), Automotive Grade Electrical Tape |
Secure and insulate wire connections for safety and durability. Use 3M or Gardner Bender products for consistent quality. |
|
Cable Management |
Cable Ties, Wire Loom, or Conduit |
Keeps wires neat and prevents damage from heat or movement. Panduit and Gardner Bender offer sturdy options that hold up well over time. |
|
Trim Removal |
Plastic Trim Removal Tools |
Used to safely remove interior or exterior panels without scratching or cracking surfaces. Neiko and GOOACC make affordable and dependable kits. |
|
Fasteners |
Automotive Grade Double Sided Tape, Strong Adhesive |
For mounting the control unit and display unit securely in place. 3M automotive tape is a top choice for lasting adhesion. |
|
Cleaning |
Rubbing Alcohol, Microfiber Cloth |
Ensures all surfaces are clean before applying adhesives or tapes, improving bonding strength. Meguiar’s or Chemical Guys microfiber cloths are soft and lint-free. |
|
Optional (for professional finish) |
Heat Gun and Heat Shrink Tubing |
Creates a weather-resistant seal on electrical connections, making your installation look clean and professional. Wagner and Milwaukee heat guns are great for controlled heat application. |
|
Optional (for safer power connection) |
Add a Circuit Fuse Tap Kit |
Allows you to draw power safely from the fuse box without cutting or splicing factory wires. Bussmann and Nilight fuse tap kits are dependable and easy to use. |
Pro Tip: Before purchasing a hole saw, always confirm the sensor size specified in your kit. Most sensors require an opening between 18 and 25 millimeters, but sizes can vary slightly by brand. Using the correct hole size ensures a snug, secure fit and a professional-looking result.
Taking the time to gather these items and familiarize yourself with their functions will make your installation smoother, safer, and far more enjoyable.
Pre-Installation Checklist and Critical Safety Precautions
Before touching any tools or wires, take a few moments to prepare properly. Safety is not just a recommendation here; it is an absolute requirement. A careful start ensures both your protection and the integrity of your vehicle.
Safety First
Whenever you work on a vehicle’s electrical system, safety must come before speed or convenience. A responsible and well-informed approach will prevent injury, avoid costly mistakes, and give you confidence throughout the installation. This section demonstrates the professional care and trustworthiness that every DIY enthusiast should follow.
Preventing Damage
Even a small oversight can lead to damage to your car’s paint, wiring, or electronics. Following these steps carefully will protect your vehicle and set you up for a successful, stress-free installation.
|
Step |
Action |
Rationale / Safety Note (Crucial) |
|
1. Gather All Items |
Make sure all your tools, materials, and the parking sensor kit are close at hand before you start. |
Prevents interruptions and ensures you have everything needed for a complete and safe installation. |
|
2. Read Instructions |
Review both the parking sensor kit manual and your car’s service manual, if available. |
Helps you understand wiring diagrams, disassembly steps, and product requirements, reducing the risk of mistakes. |
|
3. Disconnect Battery |
CRITICAL: Always disconnect the negative terminal of the car battery first before beginning any electrical work. |
This prevents electrical shocks, short circuits, and potential damage to your vehicle’s electronic systems. It is absolutely non-negotiable. |
|
4. Park Safely |
Park your car on a level, stable surface and engage the parking brake. |
Prevents any accidental vehicle movement while you work. |
|
5. Ventilate Area |
Choose a workspace with good ventilation, especially if you will use adhesives, paints, or cleaning agents. |
Ensures proper airflow and protects you from inhaling harmful fumes. |
|
6. Protect Paintwork |
Cover nearby areas with painter’s tape or soft cloths before drilling or removing the bumper. |
Shields your vehicle’s finish from scratches or accidental damage. |
|
7. Prepare Bumper Area |
Clean the surface thoroughly where the sensors will be installed. |
Helps ensure accurate drilling, strong adhesion, and proper sensor alignment. |
|
8. Plan Wire Routing |
Visualize and mark the safest, most discreet path for all wiring, keeping it away from heat, sharp edges, or moving parts. |
Essential for long-term reliability and protection against future electrical problems. |
Important Reminder:
Disconnecting the battery is the single most important step in this process. Skipping it can cause serious injury or damage to your vehicle’s electrical system. Always begin by removing the negative terminal and keep it disconnected until all wiring is complete.
Pro Tip: Consider printing a simple visual checklist and keeping it nearby as you work. Having a physical list to tick off each step not only helps with organization but also reinforces good safety habits that will serve you well in every future DIY project.
The DIY Installation Process: Your Step-by-Step Guide
This section takes you through every stage of the installation in clear, practical detail. Each step includes what to do, why it matters, exact measurements where they are commonly used, and tips for solving common challenges. Add original photos or short videos at each major stage to show real-life progress and boost trust.
1. Planning and marking sensor placement
- Clean the bumper where you will mark the positions.
- Use painter's tape to mask the area you will work on.
- Find the center of the bumper and mark it.
- Mark the outer sensor positions about 15 to 20 centimeters in from each corner for most sedans. For larger vehicles and SUVs, use about 20 to 30 centimeters from the corners.
- Place remaining sensors evenly between the outer marks. For a typical four-sensor kit, this gives roughly equal spacing across the bumper.
- Aim to mount sensors at a height of about 50 to 70 centimeters from the ground on most cars. For very low sports cars, go lower with caution. For tall trucks, you may mount slightly higher, but test for blind spots.
Even spacing and correct height minimize blind spots and give consistent distance readings. Masking tape lets you experiment visually without committing to holes.
• Use a flexible tape measure to follow bumper curvature when spacing sensors.
• Temporarily stick a sensor or a round template to each mark, step back, and view from several angles to confirm symmetry.
• If your bumper is heavily curved, move sensors slightly toward flatter sections while keeping overall coverage. Document your test marks with photos so you can replicate if you need to reposition.
Image suggestion: Diagram that shows placement for a flat sedan bumper, a curved hatchback bumper, and an SUV bumper with the distances noted.
2. Bumper removal if applicable
When to remove the bumper
Remove the bumper when you cannot access the inner cavity to route wires or when the kit instructions require it. If you can reach the cavity and pull wires through easily, you can avoid removal.
General steps
- Remove visible screws and bolts from the wheel wells and under the bumper. Keep hardware in labeled containers.
- Use trim tools to release plastic clips smoothly. Work one side at a time.
- Support the bumper while disengaging from the clips to avoid bending or scratching. Have a second person help with larger bumpers.
- Once free, lay the bumper on a soft surface to avoid paint damage.
• Study your car manual or a reliable model-specific video before attempting removal. Each model can have unique clips and fasteners.
• If a clip feels stuck, do not force it. Apply gentle, even pressure with the trim tool and check for hidden screws.
Video concept: Short, sped-up clip showing careful bumper removal and reinstallation for a common model.
3. Drilling sensor holes
- Confirm sensor hole diameter from your kit, usually between 18 and 25 millimeters. Verify with the sensor and template before drilling.
- Clamp a scrap piece of wood or thick cardboard behind the drilling area inside the bumper to prevent blowout.
- Use a drill at low speed and let the hole saw cut slowly. Keep the drill steady and perpendicular to the bumper surface.
Slow controlled drilling prevents cracking and gives clean edges for a snug sensor fit.
• Use a hole saw designed for plastic for plastic bumpers and for metal if your bumper has metal reinforcement.
• If the bumper has a paint clear coat, score the surface first with a small pilot bit so the hole saw does not slip.
Image suggestion: Close-up of a clean, freshly drilled sensor hole with smooth edges.
4. Mounting sensors and routing wires
- Test fit each sensor into its hole before removing the protective film. Ensure the sensor face sits flush with the exterior surface.
- Route sensor wires into the bumper cavity gently, avoiding sharp bends.
- Secure each sensor inside the bumper with the clip or foam padding provided by the kit to stop vibration.
Flush mounting and proper orientation ensure accurate readings and prevent water ingress.
• If sensors are directional, note their orientation. Some models will have an arrow or mark showing which side must face up.
• Use cable ties inside the bumper to keep wires from dangling near reinforcements.
Image suggestion: Photo showing a sensor seated flush with its wire routed neatly into the bumper cavity.
5. Wiring the control unit: power, ground, and reverse light
- Identify the reverse light power wire using a multimeter. With the ignition on and the car in reverse, the reverse light circuit should show 12 volts. Always confirm with your meter.
- Choose a clean metal point close to the control unit as your ground. Scrape paint to expose bare metal if needed.
- Connect sensor harnesses to the control unit following the kit labels. Match colors and plug types carefully.
• Use proper crimp connectors or solder each electrical join and protect it with heat shrink tubing.
• For power, either hard-wire to the reverse light or add a circuit fuse tap to draw switched power from the fuse box without cutting factory wires.
Refer to your vehicle wiring diagram or service manual for wire color codes and connector details. Following automotive electrical best practices reduces the risk of faults and demonstrates reliable, expert-quality work.
• Never guess which wire is which. Confirm each wire with the multimeter.
• Keep connections tight and protected from moisture. Use dielectric grease in wet environments where appropriate.
Screenshot suggestion: A Clear photo or diagram showing the multimeter probe positions when testing the reverse light wire.
6. Installing the display, buzzer, and control unit
- Mount the control unit in a dry, protected location such as inside the trunk or behind a rear panel. Avoid heat sources.
- Position the display where the driver can see it without distraction, such as on the dashboard or near the rearview mirror. Ensure the view is not blocked.
- Secure all units with automotive double-sided tape or screws provided in the kit. Use cable ties to keep wires tidy.
Correct placement preserves the system's life and keeps the cabin tidy and professional.
• If the display uses a solar panel, place it where it will get light but will not obstruct the driver.
• Use grommets where wires pass through metal panels to prevent insulation chafing.
7. Reassembly and final touches
- Refit the bumper or panels in reverse order of removal. Check that every clip and bolt is reinstalled.
- Tidy wiring and trim any excess cable tie length. Use wire loom where wires might rub.
- Clean the bumper and surrounding area to remove dust and fingerprints.
A careful reassembly protects clips, preserves paint, and gives a factory-finished look.
• Test the sensors with the vehicle in reverse before completing reassembly to confirm operation and to allow small adjustments if needed.
• If colors do not match and you want a perfect look, use touch-up or spray paint matched to your car for the sensor rings only.
Quick step summary table
|
Step |
Description |
Key considerations |
|
1 |
Planning and marking |
Even spacing, symmetry, height 50 to 70 cm, typical, use painter tape |
|
2 |
Bumper preparation or removal |
Consult the model manual, protect paintwork |
|
3 |
Drilling holes |
Confirm hole size, drill slowly, and use backing support |
|
4 |
Mounting sensors |
Ensure a flush fit, route wires into the cavity |
|
5 |
Wiring to the control unit |
Use a multimeter, secure power and ground, and use proper connectors |
|
6 |
Install the display and control unit |
Visibility for the driver, protected location for the control unit |
|
7 |
Reassembly |
Secure clips and screws, hide wiring, clean finish |
Final expert tips:
Always test each sensor individually as you go by applying a temporary obstacle and watching the display.
Photograph each major step. Photos make troubleshooting easier later and support a strong, credible guide.
Keep a small repair kit with spare connectors, heat shrink tubing, and extra cable ties for future maintenance.
Post Installation: Testing and Troubleshooting
Installing your parking sensors is only half the journey. The final step is ensuring that your system works flawlessly. Proper testing not only confirms that every connection is correct but also prevents future issues after your bumper and trim are reassembled.
1. Testing Your New Parking Sensor System
Initial Power Up
After all wiring is complete but before final reassembly, reconnect the car battery. Watch for normal operation of all electrical systems, such as lights, indicators, and the radio. Then engage reverse to activate the parking sensor system. You should hear an initial beep or see the display light up, signaling the system is ready.
Systematic Testing
Test each sensor individually and as a group to confirm accurate detection. Testing at this stage allows you to make minor adjustments before everything is permanently reassembled.
Expert Tip: Test thoroughly before reinstalling the bumper and interior panels. It is much easier to troubleshoot now than after the bumper is back in place.
Step-by-Step Testing Guide
|
Step |
Action |
Expected Outcome / Check |
|
1. Reconnect Battery |
Reconnect the negative terminal of the car battery. |
All car systems, including lights and radio, should power on normally. |
|
2. Start Vehicle & Engage Reverse |
Start the car and carefully shift into reverse gear. |
The parking sensor system, including display and audible alerts, should activate. You may hear an initial beep. |
|
3. Test Each Sensor Individually |
Slowly approach each sensor with your hand, a large object, or a cardboard box. |
Each sensor should detect the object, and the display or buzzer should indicate distance changes. |
|
4. Test with Objects |
Place objects at various distances behind and in front of sensors. |
Confirm that distance readings are accurate and alarm frequency increases as objects get closer. |
|
5. Check for False Alarms |
Drive slowly in a clear, obstacle-free area such as an empty parking lot. |
The system should remain silent, indicating no false detections when no obstacles are present. |
|
6. Adjust Sensitivity (If Applicable) |
Follow the kit manual for adjusting sensor sensitivity. |
Fine-tune the system to avoid overly sensitive or insensitive readings for your environment. |
|
7. Final Visual Inspection |
Examine all sensors, wires, and connections carefully. |
Ensure sensors are flush, wires are secure, and the overall installation looks neat and professional. |
Checklist for Thorough Testing
- Battery reconnected and electrical systems functioning.
- Reverse gear triggers the sensor display and audible alerts.
- Each sensor detects objects correctly and consistently.
- Distance readings correspond accurately to object proximity.
- No false alarms in open, obstacle-free areas.
- Wires are secured, routed neatly, and free from pinch points.
- Sensors are flush with the bumper and correctly oriented.
Expert Tip: Testing in stages prevents unnecessary rework. Start with individual sensors, then test combinations, and finally simulate real-world parking situations with multiple objects. Take photos or notes if adjustments are needed, so you can track progress.
Pro Tip: Keep a small toolkit with you during testing. Quick access to wire strippers, tape, or connectors allows minor adjustments on the spot without needing to remove the bumper again.
Troubleshooting Common Parking Sensor Issues
Even after a careful installation, parking sensor systems can occasionally experience issues. Most problems are simple to diagnose and fix if you approach them systematically. The key is to isolate the cause, address it step by step, and always consult your kit manual for model-specific guidance.
Consider creating a flowchart or checklist for quick reference. This visual tool can help you identify the cause faster and guide you through the solution.
Common Problems and How to Fix Them
|
Problem |
Possible Cause |
Solution |
|
Sensors not activating |
Loose wire connection, no power to the control unit, incorrect reverse light tap, faulty control unit |
1. Inspect all wiring connections to ensure they are secure. 2. Use a multimeter to confirm power is reaching the control unit. 3. Verify the reverse light wire tap is correct. 4. If the control unit has diagnostic lights or codes, follow the kit manual for troubleshooting. |
|
False alarms / Constant beeping |
Sensor obstruction (dirt, ice, bumper sticker), incorrect sensitivity, misaligned sensor, electromagnetic interference |
1. Clean all sensor faces thoroughly. 2. Adjust sensor sensitivity if your kit allows it. 3. Check sensor alignment and make sure they are flush with the bumper. 4. Remove or relocate any potential sources of electromagnetic interference near the sensors. |
|
Inconsistent readings / No detection |
Faulty sensor, loose connection, electromagnetic interference, incorrect placement |
1. Inspect each sensor and wiring connection for damage or looseness. 2. Test the sensor output with a multimeter if possible. 3. Try repositioning the control unit or rerouting wires away from power sources. 4. Review the placement diagram and ensure sensors are at the correct spacing and height. |
|
Display not working |
Loose display wire, faulty display unit, no power to the display |
1. Check the display wiring and connections. 2. Confirm that the display is receiving power. 3. If wiring is correct, consider replacing the display unit according to the kit instructions. |
|
The sensor is detecting too early or too late |
Incorrect sensitivity settings, environmental factors |
1. Adjust sensor sensitivity per the kit manual. 2. Be aware that heavy rain, snow, or reflective surfaces can affect readings temporarily. |
|
Bumper damage during drilling |
Incorrect drill bit or excessive force |
1. Always use the hole size recommended for your sensors. 2. Drill slowly and steadily. 3. Start with a small pilot hole if needed. 4. If damage occurs, repair with body filler and touch-up paint to prevent corrosion or cosmetic issues. |
|
Wiring issues (shorts or no power) |
Improper insulation, incorrect wiring, and pinched wires |
1. Inspect all wiring for proper insulation and correct connections. 2. Use heat-shrink tubing or electrical tape to protect exposed wires. 3. Ensure the wire path avoids sharp edges or moving parts. 4. Confirm polarity and connection points match the kit diagram. |
Step-by-Step Diagnostic Approach
- Visual Inspection: Look for loose wires, disconnected plugs, misaligned sensors, or debris on sensor faces.
- Power Verification: Use a multimeter to check that the control unit and display are receiving proper voltage.
- Sensor Isolation: Test each sensor individually with an object at different distances to confirm proper detection.
- Environmental Check: Note if readings change under rain, snow, or metal obstructions. This can help identify false alarms caused by external factors.
- Manual Consultation: Refer to your kit’s troubleshooting guide for diagnostic codes, advanced adjustments, or replacement instructions.
Expert Tip: Many issues are caused by simple wiring or alignment errors. Taking time to double-check each connection and the placement of sensors often resolves problems without the need for replacements. Keep a small troubleshooting toolkit on hand with a multimeter, extra connectors, and tape for quick fixes.
Pro Tip: Document your checks with notes or photos. This helps track what you have tested and provides a reference if future issues arise.
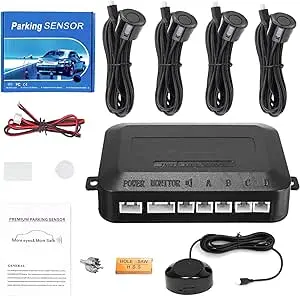
Choosing Your Kit: Product Recommendations and Buyer’s Guide
Selecting the right parking sensor kit is crucial for a successful DIY installation. A quality kit can save time, reduce headaches, and ensure accurate detection, while a poorly chosen system may lead to false alarms, poor coverage, or unnecessary rework.
1. What to Look for in a DIY Parking Sensor Kit
When evaluating a kit, consider the following essential features:
- Sensor Count: Most cars benefit from four sensors at the rear. Some larger vehicles or those adding front coverage may require six or eight sensors. More sensors generally provide better coverage but add complexity.
- Display Type: Kits may include an audible buzzer, a visual LED display, or a combination of both. Choose a display style that works best for you and does not obstruct your line of sight.
- Weatherproofing: Sensors are exposed to rain, mud, and road debris. Look for IP-rated waterproof sensors to ensure durability in all conditions.
- Adjustable Sensitivity: Kits with adjustable sensitivity allow you to fine-tune detection range, preventing false alarms from small obstacles or nearby metal objects.
Compatibility
Before purchasing a kit, verify it works with your specific vehicle. Important considerations include:
- Bumper Material: Plastic bumpers are straightforward, but some metal or carbon fiber bumpers may require specialized sensors or mounting methods.
- Vehicle Voltage: Most passenger cars use 12-volt systems, but confirm compatibility if you drive a truck, van, or electric vehicle.
- Existing Wiring and Electronics: Some vehicles have advanced electrical systems that require careful integration to avoid interference.
Pre Purchase Compatibility Checker
Consider using a simple checklist before buying:
- Does the kit support your car’s voltage?
- Are the sensors compatible with your bumper material and shape?
- Does the kit include enough sensors for front and rear coverage if needed?
- Is the display style suitable for your cabin layout?
- Does the kit offer adjustable sensitivity or advanced features if desired?
Objective and Transparent Evaluation
When recommending or evaluating products, clearly state the criteria you are using:
- Reliability: How well the sensors perform in real-world conditions over time.
- Ease of Installation: Are instructions clear? Do the sensors require complex modifications?
- Features: Detection range, display type, alerts, and additional options.
- Value: Cost relative to quality and included features.
Expert Tip: Avoid purchasing the cheapest kit without verifying reliability and compatibility. A slightly higher investment in a well-reviewed system often results in better long-term performance, fewer false alarms, and a smoother DIY experience.
2. Product Roundup: Best Parking Sensor Kits for DIY Installation
Choosing the right parking sensor kit can make a huge difference in your DIY experience. Here’s a curated selection of top kits, catering to different budgets, installation preferences, and vehicle types. Each entry includes key features, pros, cons, estimated price, and an ideal user scenario.
1. Steelmate PTS400EX-Reliable Performance at a Budget Price
The Steelmate PTS400EX is one of the most popular ultrasonic parking sensor kits among DIY installers, and for good reason. It’s a straightforward system that delivers reliable performance without unnecessary complexity. The kit includes four ultrasonic sensors, an LED display, and an audible alert system that activates automatically when the car is put in reverse. Each sensor is waterproof, making it suitable for all weather conditions.
Installation requires drilling the bumper, but Steelmate provides well-marked hole saw guides to make the process easier. Once installed, the system performs impressively, giving accurate distance readings and timely warnings.
Ideal For: Budget-conscious car owners who want a proven, reliable kit with solid detection accuracy and don’t mind a little extra effort during installation
- Accurate and consistent detection of obstacles.
- Waterproof sensors ensure durability and long term use.
- LED display and beeping alerts are intauitive nd easy to interpret
- Trusted global brand with readily available replacement parts.
- Great value for money for those comfortable with basic DIY tools.
- Requires bumper drilling, which may intimidate beginners.
- The display is functional but visually basic.
- Slightly more installation time than no drill alternatives.

STEELMATE Matt Black 4 Rear Reverse Parking Sensors OE Flush Fit PTS400EX DP
2. WAECO MagicWatch MWE 8XX Series-Premium OEM Grade Finish
The WAECO MagicWatch series is often regarded as one of the most professional-looking aftermarket parking systems available. This ultrasonic kit is designed for car owners who value both performance and aesthetics. The flush-mount sensors can be painted to match the car’s bumper, offering a seamless factory finish.
The sensors are highly precise, and the system allows adjustable sensitivity ideal for tailoring performance to vehicle size and environment. However, because of its OEM-style installation, the MagicWatch can be more demanding for beginners and is best suited for those with moderate DIY experience or assistance from someone knowledgeable in car wiring.
Ideal For: Car enthusiasts who want a clean, professional-grade result that looks and feels like a factory-installed system.
- Professional, OEM style finish that blends perfectly with vehicle design.
- Adjustable sensitivity provides fine control over detection distance.
- Durable build quality designed for long term use.
- Excellent accuracy even in challenging environments.
- Higher price point than most basic kits.
- Flush mount sensors require precise drilling and paint matching.
- Installation may be tricky for first time DIYers.
Car Rear Reversing Radar Kit with 4 Parking Sensors, Audible Warning - Black
3. Parking Dynamics PD1-The No Drill, Sleek Solution
The Parking Dynamics PD1 is an electromagnetic system that eliminates the need for drilling. Instead of separate round sensors, it uses a continuous adhesive strip that mounts behind the bumper. This design gives the PD1 a completely invisible installation, a major selling point for those who want to avoid altering their car’s exterior.
The system provides full bumper coverage, which means it detects obstacles across the entire width of the rear end. However, as with most electromagnetic systems, its detection range is slightly shorter than that of ultrasonic sensors, making it best suited for low-speed parking and close-quarters maneuvering.
Ideal For: Drivers who prioritize appearance and prefer a no-drill installation with quick setup and minimal visual impact.
- Completely invisible installation, no drilling or exposed sensors.
- Easy and quick to install with minimal tools.
- Provides consistent short-range detection across the full bumper width.
- No risk of paint damage or misaligned sensor holes.
- Limited detection range compared to ultrasonic kits.
- It can sometimes be overly sensitive to nearby metal parts.
- Not ideal for vehicles with metal bumpers or thick plastic coverings.
LUVFAY Parking Sensor Parking Sensor No Drill No Hole Car Reverse Backup Radar Sensors System Antenna
4. EPS DUAL 4.0-Advanced Electromagnetic Technology for Tight Spaces
The EPS DUAL 4.0 represents the next evolution in electromagnetic parking assistance. Like the PD1, it requires no drilling but features improved calibration technology and the option to integrate ultrasonic sensors for hybrid performance. Its full bumper coverage makes it particularly effective for vehicles that need precise short-range detection, such as compact cars or urban commuters.
Although setup can be more complex, the EPS DUAL rewards careful installers with top-tier sensitivity and flexibility. The system can adapt to various bumper shapes and thicknesses, offering reliable results in tight parking conditions.
Ideal For: Tech-savvy DIYers or drivers of compact vehicles who want a discreet, high-tech solution for tight city parking.
- An advanced, self-calibrating system reduces setup errors.
- No drilling required; clean, hidden installation.
- Excellent detection performance in confined areas.
- Optional ultrasonic integration for extended functionality.
- Higher cost than basic kits.
- More complex installation; requires accurate calibration.
- May require more time and patience for perfect tuning.
Joyzan Electromagnetic Parking Sensor, Universal Car Sensor Kit Built in Reversing Alarm Assistance Full Range Rear Induction Radar Backup System Buzzer No Drills Holes Sensors for Truck RV Minivan
5. AUTO VOX W7-Wireless Convenience with Solar Powered Display
The AUTO VOX W7 is a user-friendly wireless system designed for effortless installation. Its solar-powered display eliminates the need for complex interior wiring, making it perfect for beginners or those who want a quick installation. The system includes four waterproof ultrasonic sensors that provide reliable detection, while the adjustable angle design helps optimize sensor coverage for various bumpers.
Because the display depends on solar charging and wireless signal transmission, users should ensure the display has consistent sunlight exposure and check signal reliability before final mounting.
Ideal For: Drivers who value convenience and want a simple, quick setup without running wires through the cabin.
- Easy installation with minimal wire routing.
- Solar-powered display saves time and reduces maintenance.
- Adjustable sensor angles enhance accuracy.
- The wireless display looks clean and modern on the dashboard.
- Requires sufficient sunlight for consistent power.
- Wireless signal can occasionally experience interference.
- Wireless signals can occasionally experience interference.

Wireless Parking Aid, Reversing Aid with 4 PDC Rear Parking Sensors, Sum Distance Warning Kit with Wireless LED Display for Car, SUV, Van, Motorhome and Pickup (4 Sensors, Black)
6. Pyle PLCM7500 (Hybrid)-Full Visibility with Camera Integration
The Pyle PLCM7500 is a hybrid parking system that combines ultrasonic sensors with a rear-view camera and monitor display. This dual setup provides both audio and visual feedback, significantly improving driver awareness and parking safety. The kit is waterproof, features night vision capability, and includes a large LCD monitor for clear viewing.
Installation is more involved since it requires mounting both the camera and sensors, routing wiring, and connecting the display unit. However, for those who want a full-featured system, the result is well worth the effort.
Ideal For: Drivers who want an all-in-one solution that merges modern tech with practical safety, ideal for larger vehicles, SUVs, or drivers who frequently park in tight or low-light areas.
- Combines sensors and a camera for maximum safety and visibility.
- Large, clear display with night vision capability.
- Comprehensive feedback with both audio and video assistance.
- Ideal for reversing in low light or busy environments.
- More complex installation with extra components to mount and wire.
- A larger display may not suit all interiors aesthetically.
- Slightly higher price compared to sensor-only kits.

Parking Sensor, Parking Assist Sensor Black PDC Parking Sensor replacement for 2.5L L4 2017 2018 89341 42060/89341 42030/89341 42060 C0
Before and After: Real World DIY Success Stories
One of the most inspiring parts of installing your own parking sensors is seeing the tangible difference they make. To help you visualize the impact, we’ve gathered real-world examples from DIYers who upgraded their cars with confidence.
Why It Matters
- Community & Social Proof: Learning from other users’ experiences gives confidence and practical tips for your own installation.
- Visual Impact: Seeing results in photos reinforces how effective sensors are at protecting your vehicle and simplifying parking.
Case Study 1: Compact Sedan Transformation
- Before: Tight city streets, frequent bumper scrapes, constant anxiety during parallel parking.
- After: Installed Steelmate PTS400EX, four sensors on the rear bumper.
- Result: Smooth parallel parking, no accidental scrapes in two months, audible alerts prevent close calls.
- User Testimonial:
"I never realized how much stress parking was causing me until I installed these sensors. The difference is night and day. I feel much safer and in control."
Image suggestion: Side-by-side collage of a slightly scratched rear bumper before installation, the same bumper with sensors installed, and a car perfectly aligned in a tight space.
Case Study 2: SUV Parking Made Easy
- Before: Large SUV with blind spots, struggling in tight garages and crowded parking lots.
- After: Installed WAECO MagicWatch MWE 8XX series, flush-mounted sensors with paint-matched covers.
- Result: Professional look with excellent detection accuracy. Parallel parking and backing into tight spaces became stress-free.
- User Testimonial:
"The flush-mounted sensors blend perfectly with my SUV. I no longer worry about small posts or low walls in the parking lot."
Image suggestion: Collage showing a large SUV squeezed into a narrow parking spot before sensors, and the same vehicle maneuvered effortlessly after installation.
Case Study 3: Electromagnetic No Drill Solution
- Before: Older hatchback with tight city parking, dents, and scratches already present.
- After: Installed Parking Dynamics PD1 electromagnetic no-drill sensors.
- Result: No drilling required, installation completed in under an hour. Full bumper coverage for all tight spaces.
- User Testimonial:
"I was nervous about drilling holes in my car. The no-drill system was easy, fast, and completely invisible. My hatchback feels like new."
Image suggestion: Before image showing a scratched hatchback rear bumper, after image showing sensors barely visible, and the car parked perfectly in a narrow space.
Tips for Sharing Your Own Results
- Take clear before and after photos from the same angle.
- Include details like sensor type, installation time, and any challenges overcome.
- Short testimonials or captions make your story relatable and helpful to other DIYers.
- Encourage a community: Share on forums, social media groups, or DIY car blogs to inspire others.
Pro Tip: Highlighting successful installations not only celebrates your achievement but also helps other DIY enthusiasts learn from real examples. It’s a great way to combine education, inspiration, and social proof.
Making the Right Call: DIY versus Professional Installation
Deciding between installing parking sensors yourself or hiring a professional depends on your budget, time, skill level, and the value you place on convenience. Both approaches have benefits and potential drawbacks. Understanding these factors helps you make an informed decision that fits your priorities.
1. Detailed Cost and Time Comparison
It’s easy to focus on the sticker price, but hidden costs and benefits often make a significant difference. Here’s a transparent comparison of DIY versus professional installation:
|
Aspect |
DIY Installation |
Professional Installation |
|
Cost (Kit) |
$50 $250, purchased by DIYer, often cheaper online |
$50 $250, but often marked up by the installer |
|
Cost (Labor) |
$0, your time and effort |
$150 $400+, depending on complexity, hourly rates, and location |
|
Total Estimated Cost |
$50 $250, plus initial tool investment |
$200 $650+ |
|
Time Commitment |
2 6 hours for beginners, 1 3 hours for experienced DIYers |
1 3 hours, depending on vehicle and installer |
|
Tools Required |
Significant initial investment: drill, multimeter, trim tools, heat gun |
None, the professional provides all necessary tools |
|
Expertise Level |
Beginner to intermediate; requires patience, research, and basic electrical knowledge |
Expert; certified technicians with specialized tools and experience |
|
Warranty Impact |
Potential risk of voiding the vehicle warranty if the wiring is damaged |
Typically covered by the installer’s warranty; less risk to vehicle warranty if using a reputable shop |
|
Risk of Error |
Higher mistakes can lead to damage, electrical issues, or aesthetic flaws |
Lower professional expertise reduces the likelihood of errors |
|
Satisfaction |
High: learning new skills and achieving a DIY upgrade |
Convenience, peace of mind, professional finish |
Expert Considerations
- Tool Investment: While DIY requires purchasing tools, these costs are spread across multiple projects and can be a long-term investment for your car maintenance or upgrades.
- Warranty Awareness: Always check your vehicle’s warranty terms before modifying electrical systems. Some manufacturers may void coverage if aftermarket modifications cause damage.
- Time and Learning: DIY installation offers a sense of accomplishment, hands-on learning, and flexibility in scheduling. However, beginners should budget extra time and expect a learning curve.
- Peace of Mind: Professional installation provides convenience, a cleaner finish, and a warranty on the work, which can be valuable if you are uncomfortable with electrical tasks.
Pro Tip: If you enjoy DIY projects, even beginners can successfully install parking sensors by following detailed guides and testing thoroughly. If you prioritize speed, aesthetics, or have a complex vehicle setup, professional installation may be the safer and more convenient choice.
Decision Guide: Weigh your comfort with electrical work, time availability, and budget against the potential learning and satisfaction from doing it yourself. Either way, properly installed sensors improve safety, reduce stress, and protect your vehicle for years to come.
When to Call a Professional
While DIY installation can be highly rewarding, there are times when seeking professional help is the safer and smarter choice. Recognizing your limitations can prevent costly mistakes, protect your vehicle, and save stress.
1. Recognizing Limitations
Certain situations are better handled by an experienced installer:
- Complex Wiring or Electrical Systems: Modern cars with integrated electronics, CAN bus systems, or advanced reverse sensors may require professional knowledge to avoid damage.
- High-end or Luxury Vehicles: Vehicles with expensive bodywork or sensitive electronics can be at higher risk if mistakes occur.
- Fear of Damage or Lack of Confidence: If you are uncomfortable with drilling, wiring, or testing, a professional can complete the job efficiently and safely.
- Limited Tools or Workspace: DIY installation requires specific tools and a safe, clean working environment. Without them, mistakes are more likely.
2. Peace of Mind
- Warranty Protection: Professionals often provide a warranty for their work, reducing the risk of costly repairs if something goes wrong.
- Expertise and Efficiency: Certified technicians can install sensors quickly, cleanly, and accurately, ensuring optimal performance.
- Reduced Stress: Hiring a professional takes the guesswork out of wiring, alignment, and testing, giving you confidence that the system is reliable.
Pro Tip: Even if you enjoy DIY projects, there is no shame in calling a professional for tricky vehicles or complex systems. Combining your effort with professional guidance can also be a hybrid approach: install the sensors yourself, and have a technician handle the wiring or final testing for peace of mind.
Master Your Parking and Drive with Confidence
Installing parking sensors yourself is more than just a vehicle upgrade. It is a practical way to enhance safety, save money, and gain confidence behind the wheel. With the right guidance, tools, and precautions, even beginners can complete this project and enjoy the benefits every time they park.
1. Key Takeaways and Final Encouragement
- Safety First: Parking sensors act as an extra set of eyes, helping prevent accidents, protect pedestrians, and safeguard your vehicle.
- Cost Savings: By installing sensors yourself, you can save hundreds on professional labor while learning valuable skills.
- Convenience and Confidence: Precise alerts and optimal coverage make parking stress-free, whether in crowded streets or tight garages.
Empowerment: DIY installation is achievable if you follow step-by-step instructions, use the right tools, and take the time to plan and test your system. You are fully capable of completing this upgrade safely and effectively.
Safety Disclaimer: Always follow safety precautions, including disconnecting the battery, using proper tools, and consulting your vehicle manual. If you are unsure at any stage, professional help is the safest option.
2. Maintaining Your System for Long-Term Reliability
- Keep Sensors Clean: Regularly wipe sensor faces with a soft cloth to remove dirt, mud, or snow. Avoid harsh chemicals that could damage the sensors.
- Check Connections: Periodically inspect wiring and connectors for signs of wear, corrosion, or looseness.
- Revisit Troubleshooting: If your system shows false alarms, inconsistent readings, or no alerts, refer back to the troubleshooting section for guidance.
Pro Tip: Consistent maintenance ensures your parking sensors continue performing accurately and reliably for years to come.
3. Your Next Upgrade: Expanding Your DIY Skills
Completing a parking sensor installation is a great stepping stone into broader DIY automotive projects. Consider:
- Installing backup cameras or front sensors
- Upgrading interior electronics or dashboard displays
- Exploring vehicle lighting or audio enhancements
Call to Action: Share your installation success story, photos, or tips with the DIY community. Not only does this inspire others, but it also helps you celebrate your achievement and grow your confidence for future projects.
Final Thought: With careful planning, patience, and attention to detail, you can master your parking, protect your vehicle, and enjoy the satisfaction of a professional quality upgrade completed entirely with your own hands.